Computer Science > QUESTIONS & ANSWERS > Acess Exam Study Guide | 56 Questions with 100% Correct Answers | Verified | Updated 2023 (All)
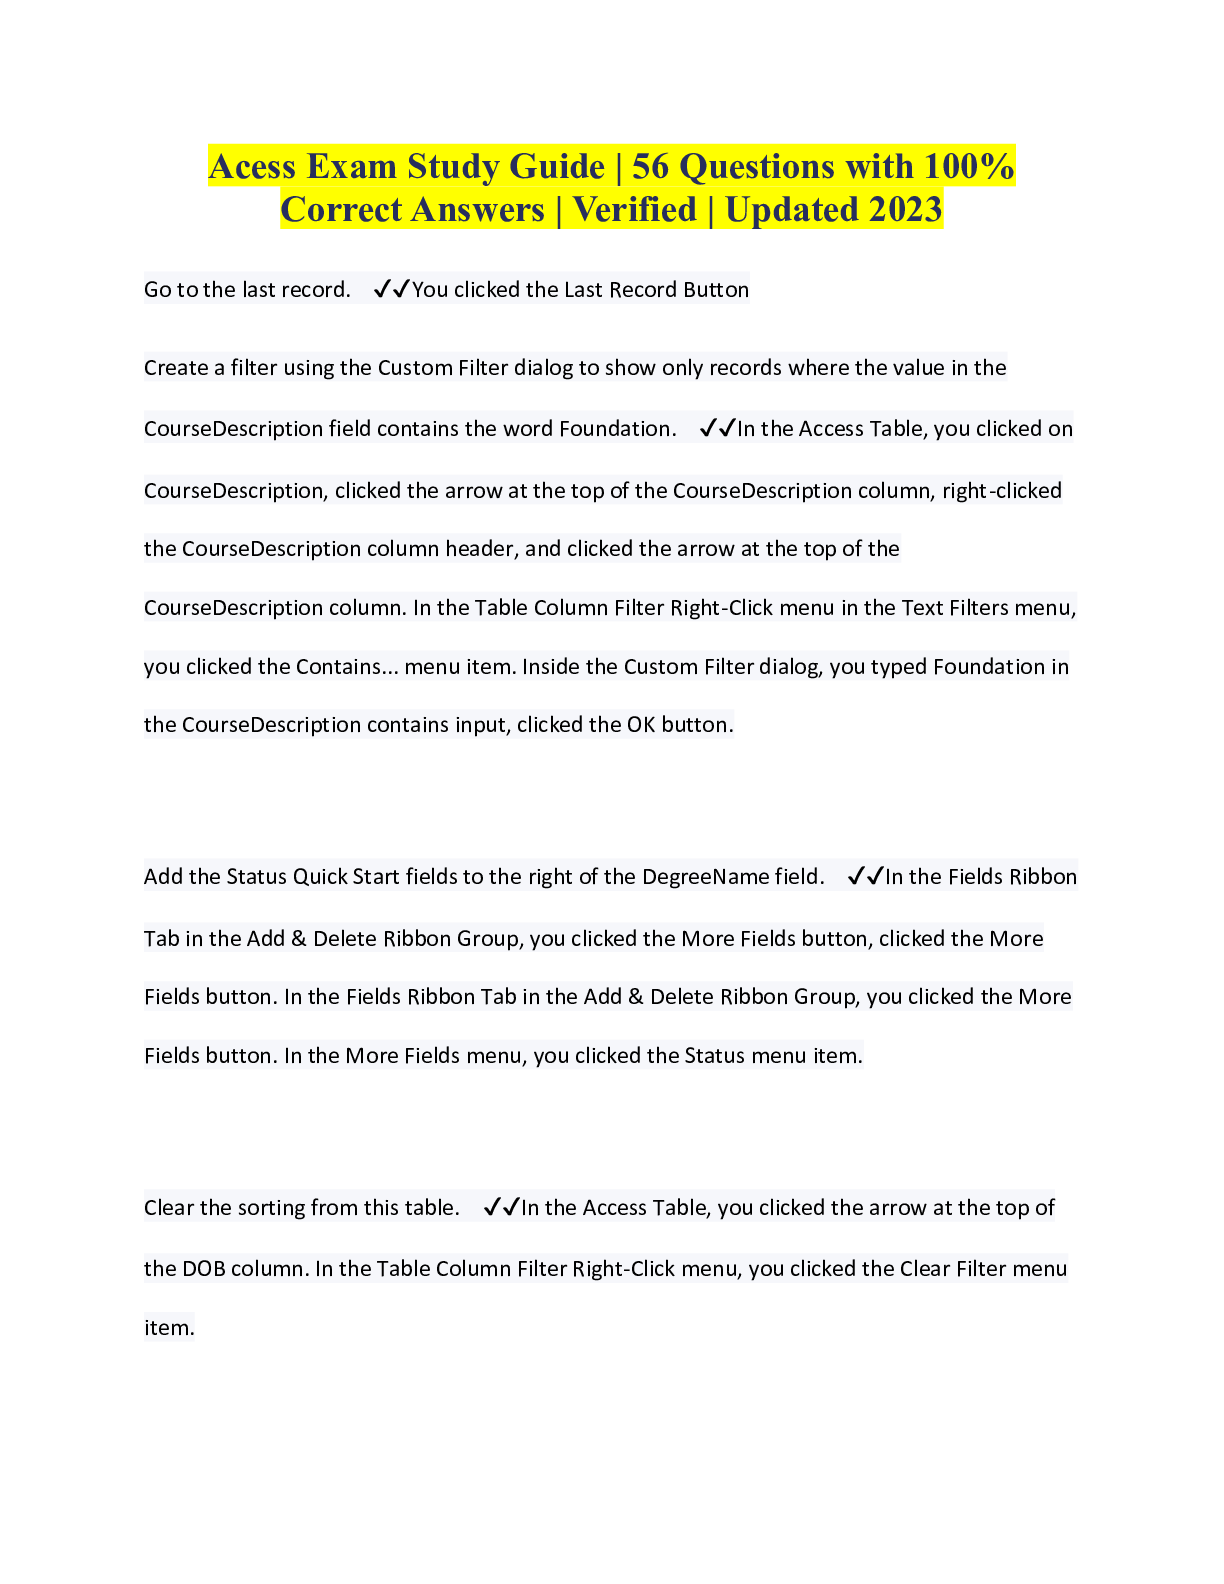
Acess Exam Study Guide | 56 Questions with 100% Correct Answers | Verified | Updated 2023
Document Content and Description Below
Acess Exam Study Guide | 56 Questions with 100% Correct Answers | Verified | Updated 2023 Go to the last record. ✔✔You clicked the Last Record Button Create a filter using the Custom Filter... dialog to show only records where the value in the CourseDescription field contains the word Foundation. ✔✔In the Access Table, you clicked on CourseDescription, clicked the arrow at the top of the CourseDescription column, right-clicked the CourseDescription column header, and clicked the arrow at the top of the CourseDescription column. In the Table Column Filter Right-Click menu in the Text Filters menu, you clicked the Contains... menu item. Inside the Custom Filter dialog, you typed Foundation in the CourseDescription contains input, clicked the OK button. Add the Status Quick Start fields to the right of the DegreeName field. ✔✔In the Fields Ribbon Tab in the Add & Delete Ribbon Group, you clicked the More Fields button, clicked the More Fields button. In the Fields Ribbon Tab in the Add & Delete Ribbon Group, you clicked the More Fields button. In the More Fields menu, you clicked the Status menu item. Clear the sorting from this table. ✔✔In the Access Table, you clicked the arrow at the top of the DOB column. In the Table Column Filter Right-Click menu, you clicked the Clear Filter menu item. Use AutoFilter to filter the query results to show only records where the value in the Department field is Accounting or Finance. ✔✔In the Access Table, you clicked on Department, clicked the arrow at the top of the Department column. In the Table Column Filter Right-Click menu, you clicked the (Select All) checkbox, clicked the Accounting checkbox, clicked the Finance checkbox, and clicked the OK button. Add a new Short Text field to the far right side of the table. Name the field: Description ✔✔In the Access Table, you clicked the arrow at the top of the Click To Add column. In the Drop-Down Menu menu, you clicked the Short Text menu item. In the Access Table, you typed Description and pressed Enter. Add a new record to the table with the student ID 6412 and advance to the second field. 1/1 ✔✔You clicked the undefined view. In the Access Table, you clicked in Cell 33 in the StudentID column, typed 4126, clicked in the 6 Cell, typed 6412, and typed 6412 and pressed Enter. Use AutoFilter to filter the query results first to show only records where value in the Department field is Economics and the value in the Credits field is 4. ✔✔In the Home Ribbon Tab in the Sort & Filter Ribbon Group, you clicked the Selection button, clicked the Advanced button. In the Access Table, you clicked the arrow at the top of the Credits column. In the Table Column Filter Right-Click menu, you clicked the 3 checkbox. In the Access Table, you clicked the arrow at the top of the Department column. In the Table Column Filter Right-Click menu, you clicked the (Select All) checkbox, clicked the Economics checkbox. In the Access Table, you clicked on Credits, clicked on Department, and clicked the arrow at the top of the Department column. In the Table Column Filter Right-Click menu, you clicked the (Select All) checkbox, clicked the Economics checkbox, and clicked the OK button. In the Access Table, you clicked the arrow at the top of the Credits column. In the Table Column Filter Right-Click menu, you clicked the 3 checkbox, clicked the OK button. Import all of the fields from the Assets worksheet in the Accounting Excel file to a new table. Use the first row as column headings. Do not change any field information. Use the AccountID field as the primary key. Accept the new table Assets. Do not save the import steps. ✔✔In the External Data Ribbon Tab in the Import & Link Ribbon Group, you clicked the New Data Source button. In the New Data Source menu in the From File menu, you clicked the Excel menu item. Inside the Get External Data - Excel Spreadsheet dialog, you clicked the Browse... button. You clicked Accounting.xlsx. Inside the File Open dialog, you clicked the Open button. Inside the Get External Data - Excel Spreadsheet dialog, you clicked the OK button. Inside the Import Spreadsheet Wizard dialog, you clicked the Next > button, checked the First Row Contains Column Headings check box, clicked the Next > button, clicked the Next > button, selected the Choose my own primary key. Radio Button, clicked the Next > button, and clicked the Finish button. Inside the Get External Data - Excel Spreadsheet dialog, you clicked the Close button. Replace all instances of the first name julie with Julie. Be sure to match the case exactly. ✔✔In the Home Ribbon Tab in the Find Ribbon Group, you clicked the Replace button. Inside the Find and Replace dialog, you typed julie in the Find What input, typed Julie in the Replace With input, checked the Match Case check box, and clicked the Replace All button. Inside the Appointments dialog, you clicked the Yes button. Delete this student record. ✔✔In the Access Table, you right-clicked the Row Selector. In the Right-Click menu, you clicked the Delete Record menu item. Inside the Spa : Database dialog, you clicked the Yes button. Modify the width of the Time column to exactly 22. ✔✔In the Access Table, you clicked on Time, right-clicked the Time column header. In the Right Click Menu menu, you clicked the Field Width menu item. Inside the Column Width dialog, you typed 22 in the Column width: input, clicked the OK button. Modify the width of the CourseDescription column to best fit the data. ✔✔In the Access Table, you clicked on CourseDescription, right-clicked the CourseDescription column header. In the Right Click Menu menu, you clicked the Field Width menu item. Inside the Column Width dialog, you checked the Standard Width check box, unchecked the Standard Width check box, and clicked the Best Fit button Sort the records in this table so they are grouped by the value in the Classification field from A to Z and then grouped within each classification by the value in the DOB field from newest to oldest. Don't forget that when sorting by multiple fields, start with the innermost sort and work your way out. ✔✔In the Access Table, you clicked on DOB, clicked the arrow at the top of the DOB column. In the Table Column Filter Right-Click menu, you clicked the Sort Z to A menu item. In the Access Table, you clicked the arrow at the top of the Classification column. In the Table Column Filter Right-Click menu, you clicked the Sort A to Z menu item. Create a new desktop database from the Updated: Students template. Do not change the location. Name the database: Students. ✔✔You opened the backstage view, clicked the New navigation button, clicked the Updated: Students template, and typed Students in the File Name box. Create a new table in Design view. Name the first field: RA ID Make the field data type: AutoNumber Add the description: Unique RA ID Set the field as the primary key. Save the table with the Name: Resident Advisors ✔✔In the Create Ribbon Tab in the Tables Ribbon Group, you clicked the Table Design button. In the Access Table, you typed RA ID, typed RA ID and pressed Tab, clicked the Drop-Down Button, clicked the AutoNumber Item, clicked in the Unique RA ID Cell, clicked in the AutoNumber Cell, typed AutoNumber and pressed Tab, and dragged the RA ID row. In the Design Ribbon Tab in the Tools Ribbon Group, you clicked the Primary Key button. You right-clicked the Table1 Tab Header. In the Right Click menu, you clicked the Save menu item. Inside the Save As dialog, you typed Resident Advisors in the Table Name: input, clicked the OK button. Add a new table in Design view. ✔✔In the Create Ribbon Tab in the Tables Ribbon Group, you clicked the Table Design button. Modify the table relationships so that when a record is updated in the Department table, the related records in the Professor table will also be updated. ✔✔In the Database Tools Ribbon Tab in the Relationships Ribbon Group, you clicked the Relationships button. In the Design Ribbon Tab in the Tools Ribbon Group, you clicked the Edit Relationships button. Inside the Edit Relationships dialog, you clicked the dialog Close button. You clicked the relationships Database. In the Design Ribbon Tab in the Tools Ribbon Group, you clicked the Edit Relationships button. Inside the Edit Relationships dialog, you checked the Cascade Update Related Fields check box, clicked the OK button. Insert a new Date/Time field named StartDate between the DegreeName and Status fields. Save the table when you are finished. ✔✔In the Access Table, you right-clicked the Status cell. In the Right Click menu, you clicked the Insert Rows menu item. In the Access Table, you typed StartDate, typed StartDate and pressed Tab, clicked the Drop-Down Button, clicked the Date/Time Item, typed Date/Time and pressed Enter, clicked in the StartDate Cell, clicked in the StartDate Cell, typed StartDate, typed StartDate and pressed Enter, typed Date/Time and pressed Enter, and typed and pressed Enter. You right-clicked the Degrees Tab Header. In the Right Click menu, you clicked the Save menu item. Apply the Short Date input mask format to the selected field (StartDate). Do not change default format or placeholder characters. ✔✔In the Access Table, you clicked the Format property box, clicked the Drop-Down Button, clicked the Short Date Item, clicked in the Date/Time Cell, clicked the Drop-Down Button, dragged the StartDate row, clicked the Format property box, clicked the Drop-Down Button, clicked the Long Time Item, clicked the Format property box, clicked the Drop-Down Button, clicked the Short Date Item, clicked the Input Mask property box, and clicked the Input Mask Build... Button. Inside the Input Mask Wizard dialog from the Input Mask list, you selected Short Date. Inside the Input Mask Wizard dialog, you clicked the Next > button, clicked the Next > button, and clicked the Finish button. [Show More]
Last updated: 2 years ago
Preview 1 out of 19 pages
Buy this document to get the full access instantly
Instant Download Access after purchase
Buy NowInstant download
We Accept:

Reviews( 0 )
$10.00
Can't find what you want? Try our AI powered Search
Document information
Connected school, study & course
About the document
Uploaded On
Apr 19, 2023
Number of pages
19
Written in
Additional information
This document has been written for:
Uploaded
Apr 19, 2023
Downloads
0
Views
85


 Answered 2023.png)


