COMPUTER S AP Compute AP Computer Science IT 477 Converge networks
Illinois State University School of information technology
Lab 1
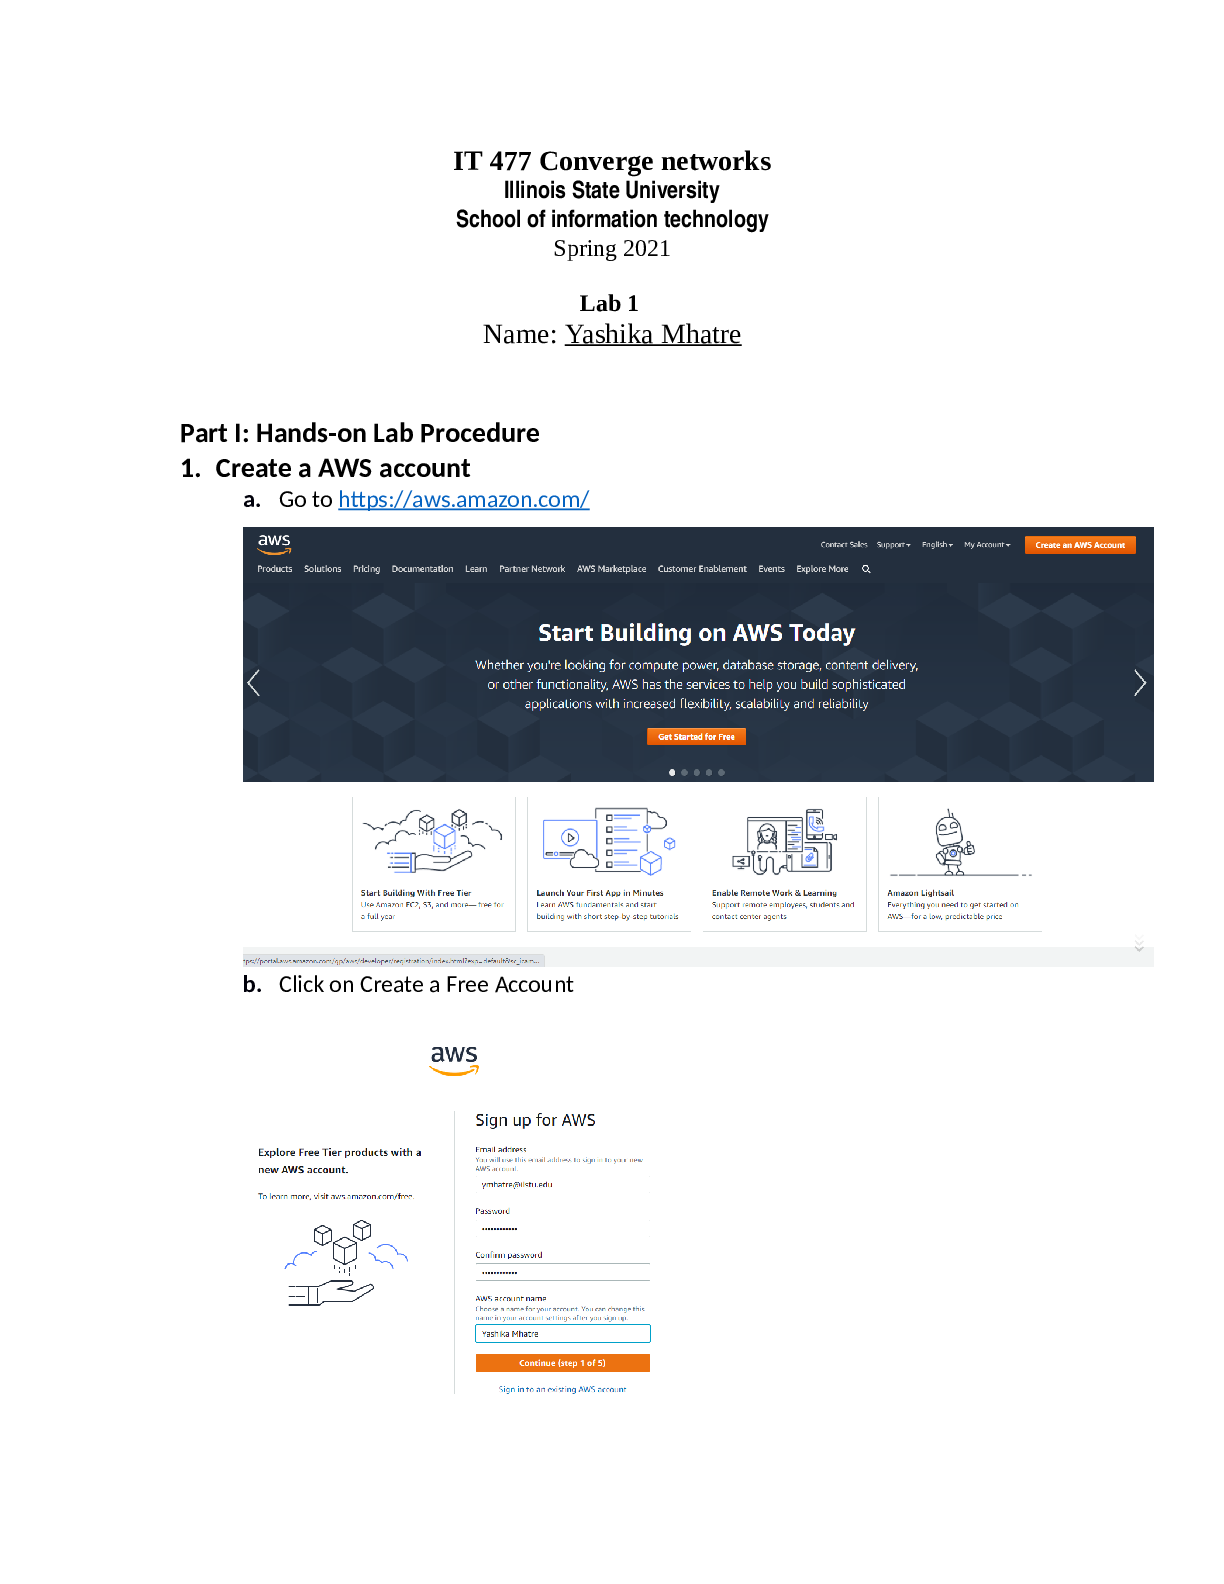
Part I: Hands-on Lab Procedure 1. Create a AWS account
e. Select BASIC support pl
...
COMPUTER S AP Compute AP Computer Science IT 477 Converge networks
Illinois State University School of information technology
Lab 1
Part I: Hands-on Lab Procedure 1. Create a AWS account
e. Select BASIC support plan
f. After Signing Up, you should see the following page.
2. Creating a Linux Instance
a. Sign in to aws.amazon.com(Under “My Account”, Click “AWS Management
Console”
b. You should see a console displayed like this
c. Under “Compute”, Click “EC2”
d. On the following page, click “Launch Instance”
e. On Step 1, select “Amazon Linux AMI 2017.03.0 (HVM), SSD Volume Type - ami-
3883a55d” (the string 3883a55d after “ami” is dynamically generated by AWS)
f. On Step 2, select the Free-tier Eligible Instance Type
g. For Steps 3, 4, 5 go with the default Options and click Next
h. On Step 6 “Configure Security Group”, click “Add Rule” and From the drop down
menu choose “Type” as HTTP.
i. On Step 7, after clicking Launch a dialog box should pop up asking to create key
pair.
j. Click Create Key Pair.
k. Enter a name (e.g., IT276) for the new key pair in the Key pair name field of
the Create Key Pair dialog box as shown above, and then click Download Key Pair.
The private key file “.pem” (e.g., IT276.pem) should be downloaded and should be saved in a safe place. Please remember the file location!
l. You can now click “Launch Instance” and then click again “view instances”.
m. You can now click “connect” to access your instance. You can either use Putty (a
SSH client) from a Windows OS machine, or directly use “terminal” from a mac or
Linux machine. A screen like below should assist you in connect with your VM
Save the DNS name of your Linux instance. E.g.,
ec2-52-15-67-53.us-east-2.compute.amazonaws.com
3. Getting into your VM
a. Windows(Use Putty)
i. Use this link to see how to use putty to connect to your instance
http://docs.aws.amazon.com/AWSEC2/latest/UserGuide/putty.html
Once you log in, you should see the putty access window as below:
4. Traceroute
a. From your Linux VM, enter the following command
traceroute www.google.com b. You should get results similar to this
5. Running a Web Server from your VM
a. Make sure you’re connected to your instance
b. Within your VM, type the following:
c. Update instance by typing:
d. Install the Apache Web server with PHP software:
e. Start the web server:
f. You can test that your web server is properly installed and started by entering the
public DNS name of your EC2 instance in the address bar of a web browser, for
example: http://ec2-42-8-168-21.us-west-1.compute.amazonaws.com. If your
web server is running, then you see the Apache test page
Part II What to hand in
The goal of this lab is to introduce you to one cloud service AWS. The following questions will demonstrate that you’ve been able to get this lab done:
1. All screenshots (similar to the web page screenshots in this documents) demonstrate you
have successfully created a Linux VM instance in AWS.
2. Show the DNS name of the created VM instance
(e.g., ec2-52-15-67-53.us-east-2.compute.amazonaws.com)
3. A screenshot shows your successful SSH access to the VM instance. Type the command
“date” and show the screenshot. (similar to the one below)
4. A screenshot shows the results of THREE times traceroute from the instance to
google.com. What are the three RTTs of this test? Are these three RTT the same? Why?
Since traceroute sends in three signal packets in a single ping there are 3 RTTs(round trip time) for each ping. However, as can be seen from the screenshot above the RTTs are not the same for any pings at all. This is because RTTs also help us understand the consistency of the pings and also to check for any latency in the network transmission.
5. A screenshot shows the successful Web access to the web server in the instance. Please
note, the DNS name as highlighted below should be clearly readable.
[Show More]