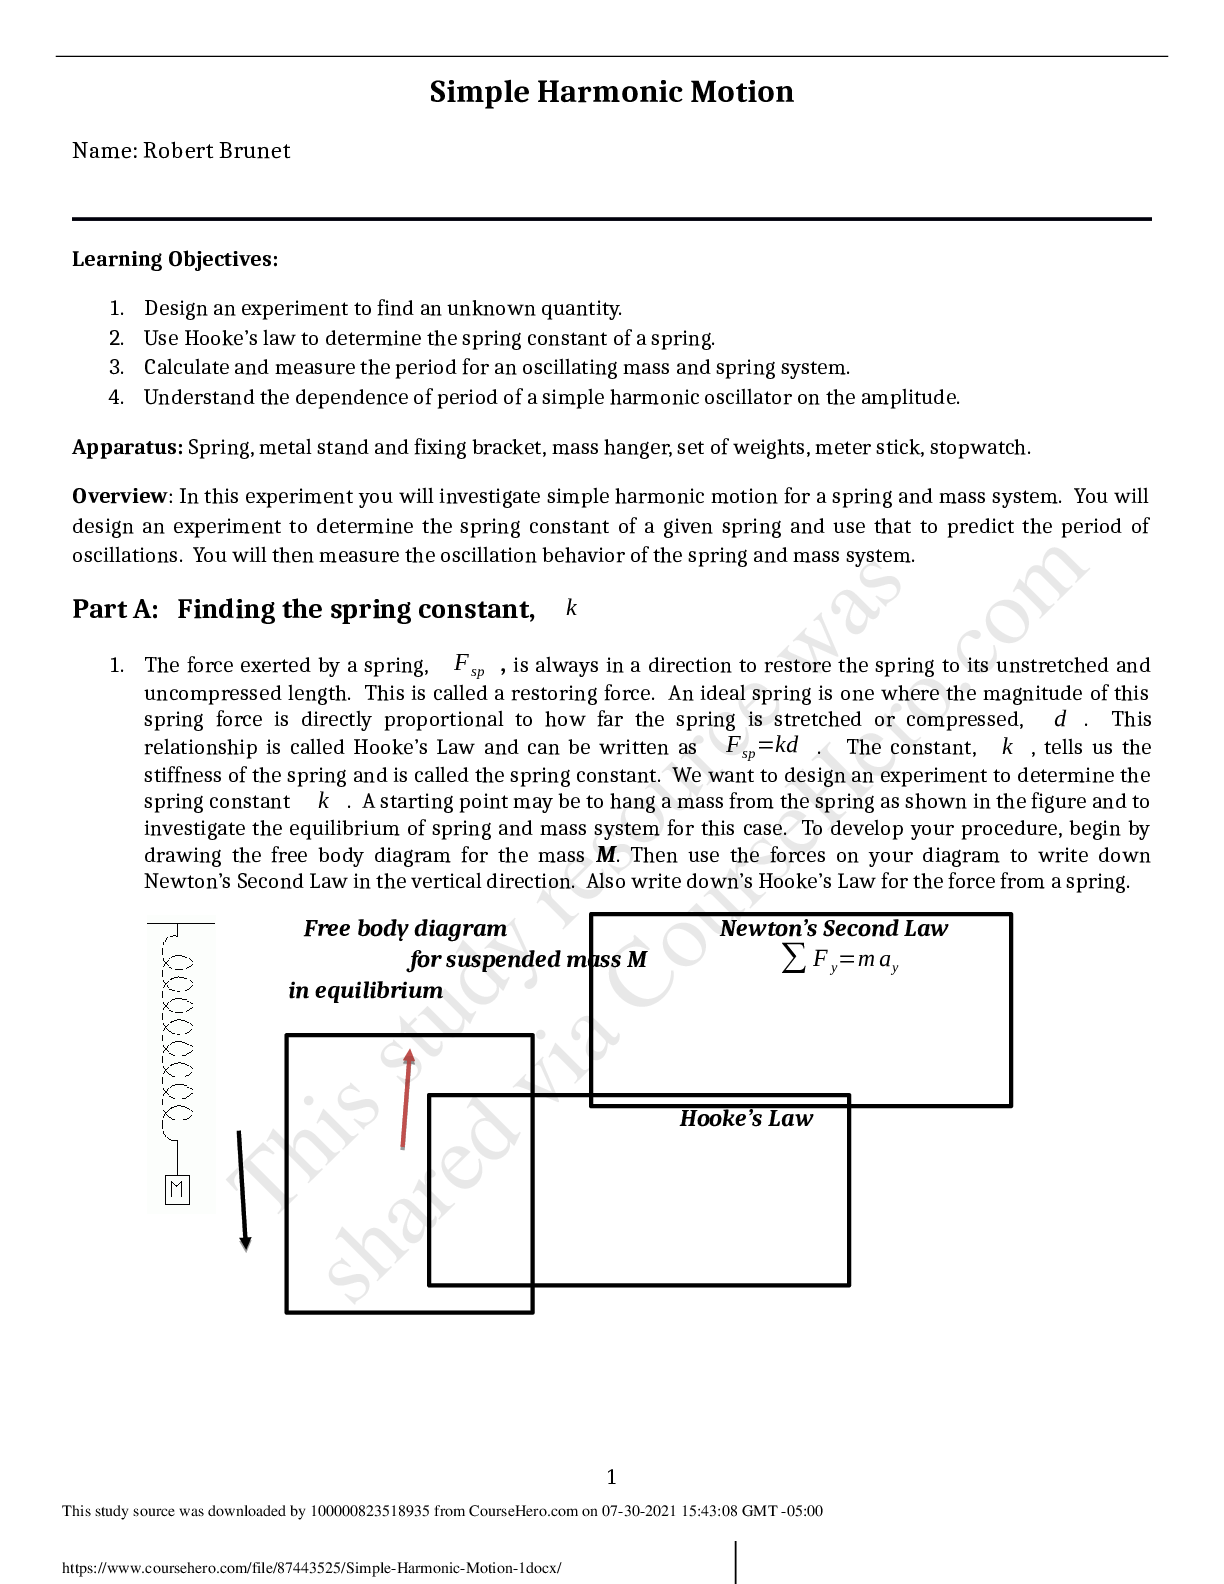
Introduction:
The third lab is about Kirchoff laws. We know by definition there are two laws of Kirchoff:
Kirchoff Current Law: It tells us that at any junction, the sum of current entering is equal to the
sum of curr
...
Introduction:
The third lab is about Kirchoff laws. We know by definition there are two laws of Kirchoff:
Kirchoff Current Law: It tells us that at any junction, the sum of current entering is equal to the
sum of current exiting at that node.
1Σ IIN = Σ IOUT.
Kirchoff Voltage Law: It says that sum of potential voltages around any closed loop in a circuit
is equal to zero.
2ΣV = 0
Based on these two laws, we will be performing our experiments and using the concepts while
attempting the theoretical part.
For this lab we will be required breadboard, wire leads, two 4.7k ohm resistors, three 1-ohm
resistor and one 10k ohm resistor. We will also need three AAA batteries along with battery
cage.
The objective to perform this experiment is to build and analyze circuits using multiple voltage
sources and define the current direction along with verifying Kirchoff laws.
Procedure:
Measuring supply voltages:
• Take two 10k ohm resistors and put them together in one row.
• Put other end of one resistor to positive section of breadboard.
• Now put the other end of other resistor on the negative section of breadboard.
• Put a wire into 3.3V on the iOlab device and put the other end of wire to the positive
section on breadboard.
• Now put a wire to the ground section on iOlab device and put the other end on the
negative section of breadboard.
• The circuit is completed and now put a wire to the A7 section on iOlab device and put it
at the junction of those two 10k ohm resistors to measure the voltage.
• Now start recording and after getting the data, multiply the voltage by 2 to get final
voltage.
• The same procedure is repeated for measuring the supply voltage of AAA batter cage.
• Remove the 3.3V and Ground wires and add positive and negative wires of battery cage
to the circuit.
Measuring Current Values:
• Connect the dongle to the computer and make sure the device is turned on.
• Now put a 4.7k ohm resistor to the left positive side of breadboard and put the other end
in any row in the middle
[Show More]