Civil Engineering > Lab Report > CET 345W Materials Testing Laboratory: Nondestructive Testing full lab report. (All)
CET 345W Materials Testing Laboratory: Nondestructive Testing full lab report.
Document Content and Description Below
Last updated: 3 years ago
Preview 1 out of 18 pages
Instant download

Buy this Document to get the Full Access Instantly
Provided by Students Who Aced it
We Verify Document Content to Gurantee Accuracy
Also available in bundle (1)
Click Below to Access Bundle(s)
CET 345W Materials Testing Laboratory all full lab reports combined.
CET 345W Materials Testing Laboratory. all full lab reports.
By Professor Lynne 4 years ago
$11
10
Reviews( 0 )
Document information
Connected school, study & course
About the document
Uploaded On
Jul 31, 2021
Number of pages
18
Written in
All

Additional information
This document has been written for:
Uploaded
Jul 31, 2021
Downloads
0
Views
172
Document Keyword Tags
Recommended For You
Get more on Lab Report »
CET 345W Materials Testing Laboratory: Shear Test of Metal Fas...
CET 345W Materials Testing Laboratory:– Impact Test full lab r...

CET 345W Materials Testing Laboratory TESTING AND INSPECTION O...
CET 345W Materials Testing Laboratory Experiment. Torsion Test

CET 345W Materials Testing Laboratory Experiment No. 9 – Compr...

CET 345W Materials Testing Laboratory Experiment No. 2 Compres...
Civil Engineering Materials 1st Edition By Nagaratnam, Carthig...

Solution Manual For MATLAB for Engineering Applications, 4th E...
Solutions Manual for Engineering Fundamentals An Introduction...

Solutions Manual for Engineering Fundamentals An Introduction...
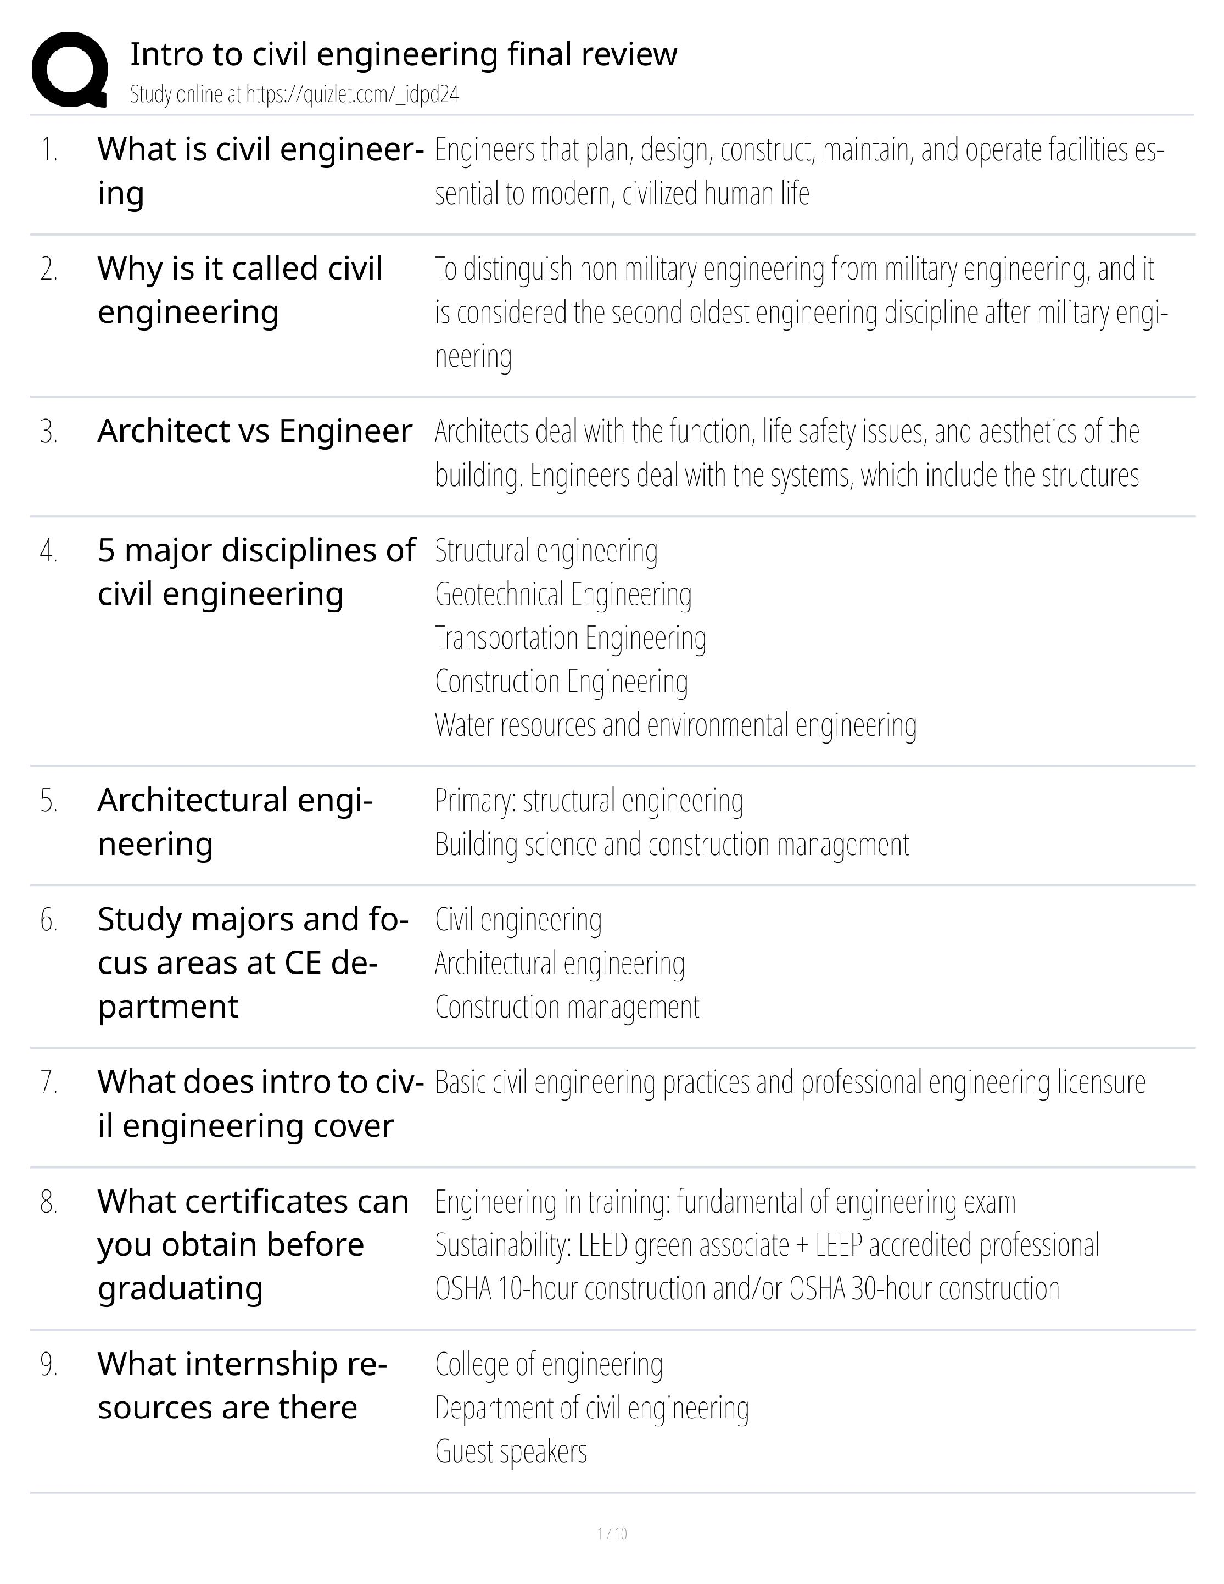
Intro to Civil Engineering Final Review / Score 100% / New 202...


.png)


